

Hello everyone, Carla here! Your friendly Gallery Education & Programming Coordinator. I have some fun and festive creative activities to share with you that will be sure to get your holly jolly! Seriously though, we could all use a little extra cheer these days and what better way to spread smiles than with some handmade creations to share with you and your loved ones.
In this tutorial I will show you step by step how to make your very own wrapping paper using potatoes. That is right, potatoes! Not just for fries anymore.

Potato printing is one of the many creative activities that I remember doing as a child and I just recently introduced my daughter to it over thanksgiving weekend when we potato printed our own custom tablecloth. It was so FUN!

Potato printing has been around since the 1940s and was recently traced back to a woman named Peggy Angus. Peggy was an artist as well as a professor at the North London Collegiate School. After the second world war art supplies were extremely hard to find so Peggy did some creative problem solving and started making playful designs and patterns using potatoes, old newspapers, and paint. This brilliant innovation has been around ever since and has been used worldwide by both children and adults.
I LOVE potato printing and here is why:
1) It’s a fun and easy project for both kids and adults.
2) It’s eco-friendly. The potatoes can be composted after or if you are looking for a quick lunch you could turn them into French fries. I would recommend cutting off the painted bits prior.
3) Most of the materials can be easily found in your home.
4) It is interchangeable throughout the seasons and the process can be used to print on paper, fabric and even wood! Just think of the possibilities.

Here is what you will need to get started:
Potatoes
A roll of Kraft Paper
Acrylic paint
Various festive cookie cutters
A knife
Paintbrush
Scissors
Cutting Board
Twine or ribbon (optional)
Greenery (optional)


Cut your potato down the middle. Be sure to cut as straight as possible as this will affect the quality of your stamp. You should now have two halves. Use one half for one shape and then use the other for a different shape. Select your cookie cutter shape and make sure that it fits on one half of the potato. The cookie cutter should not overlap the edge of the potato.
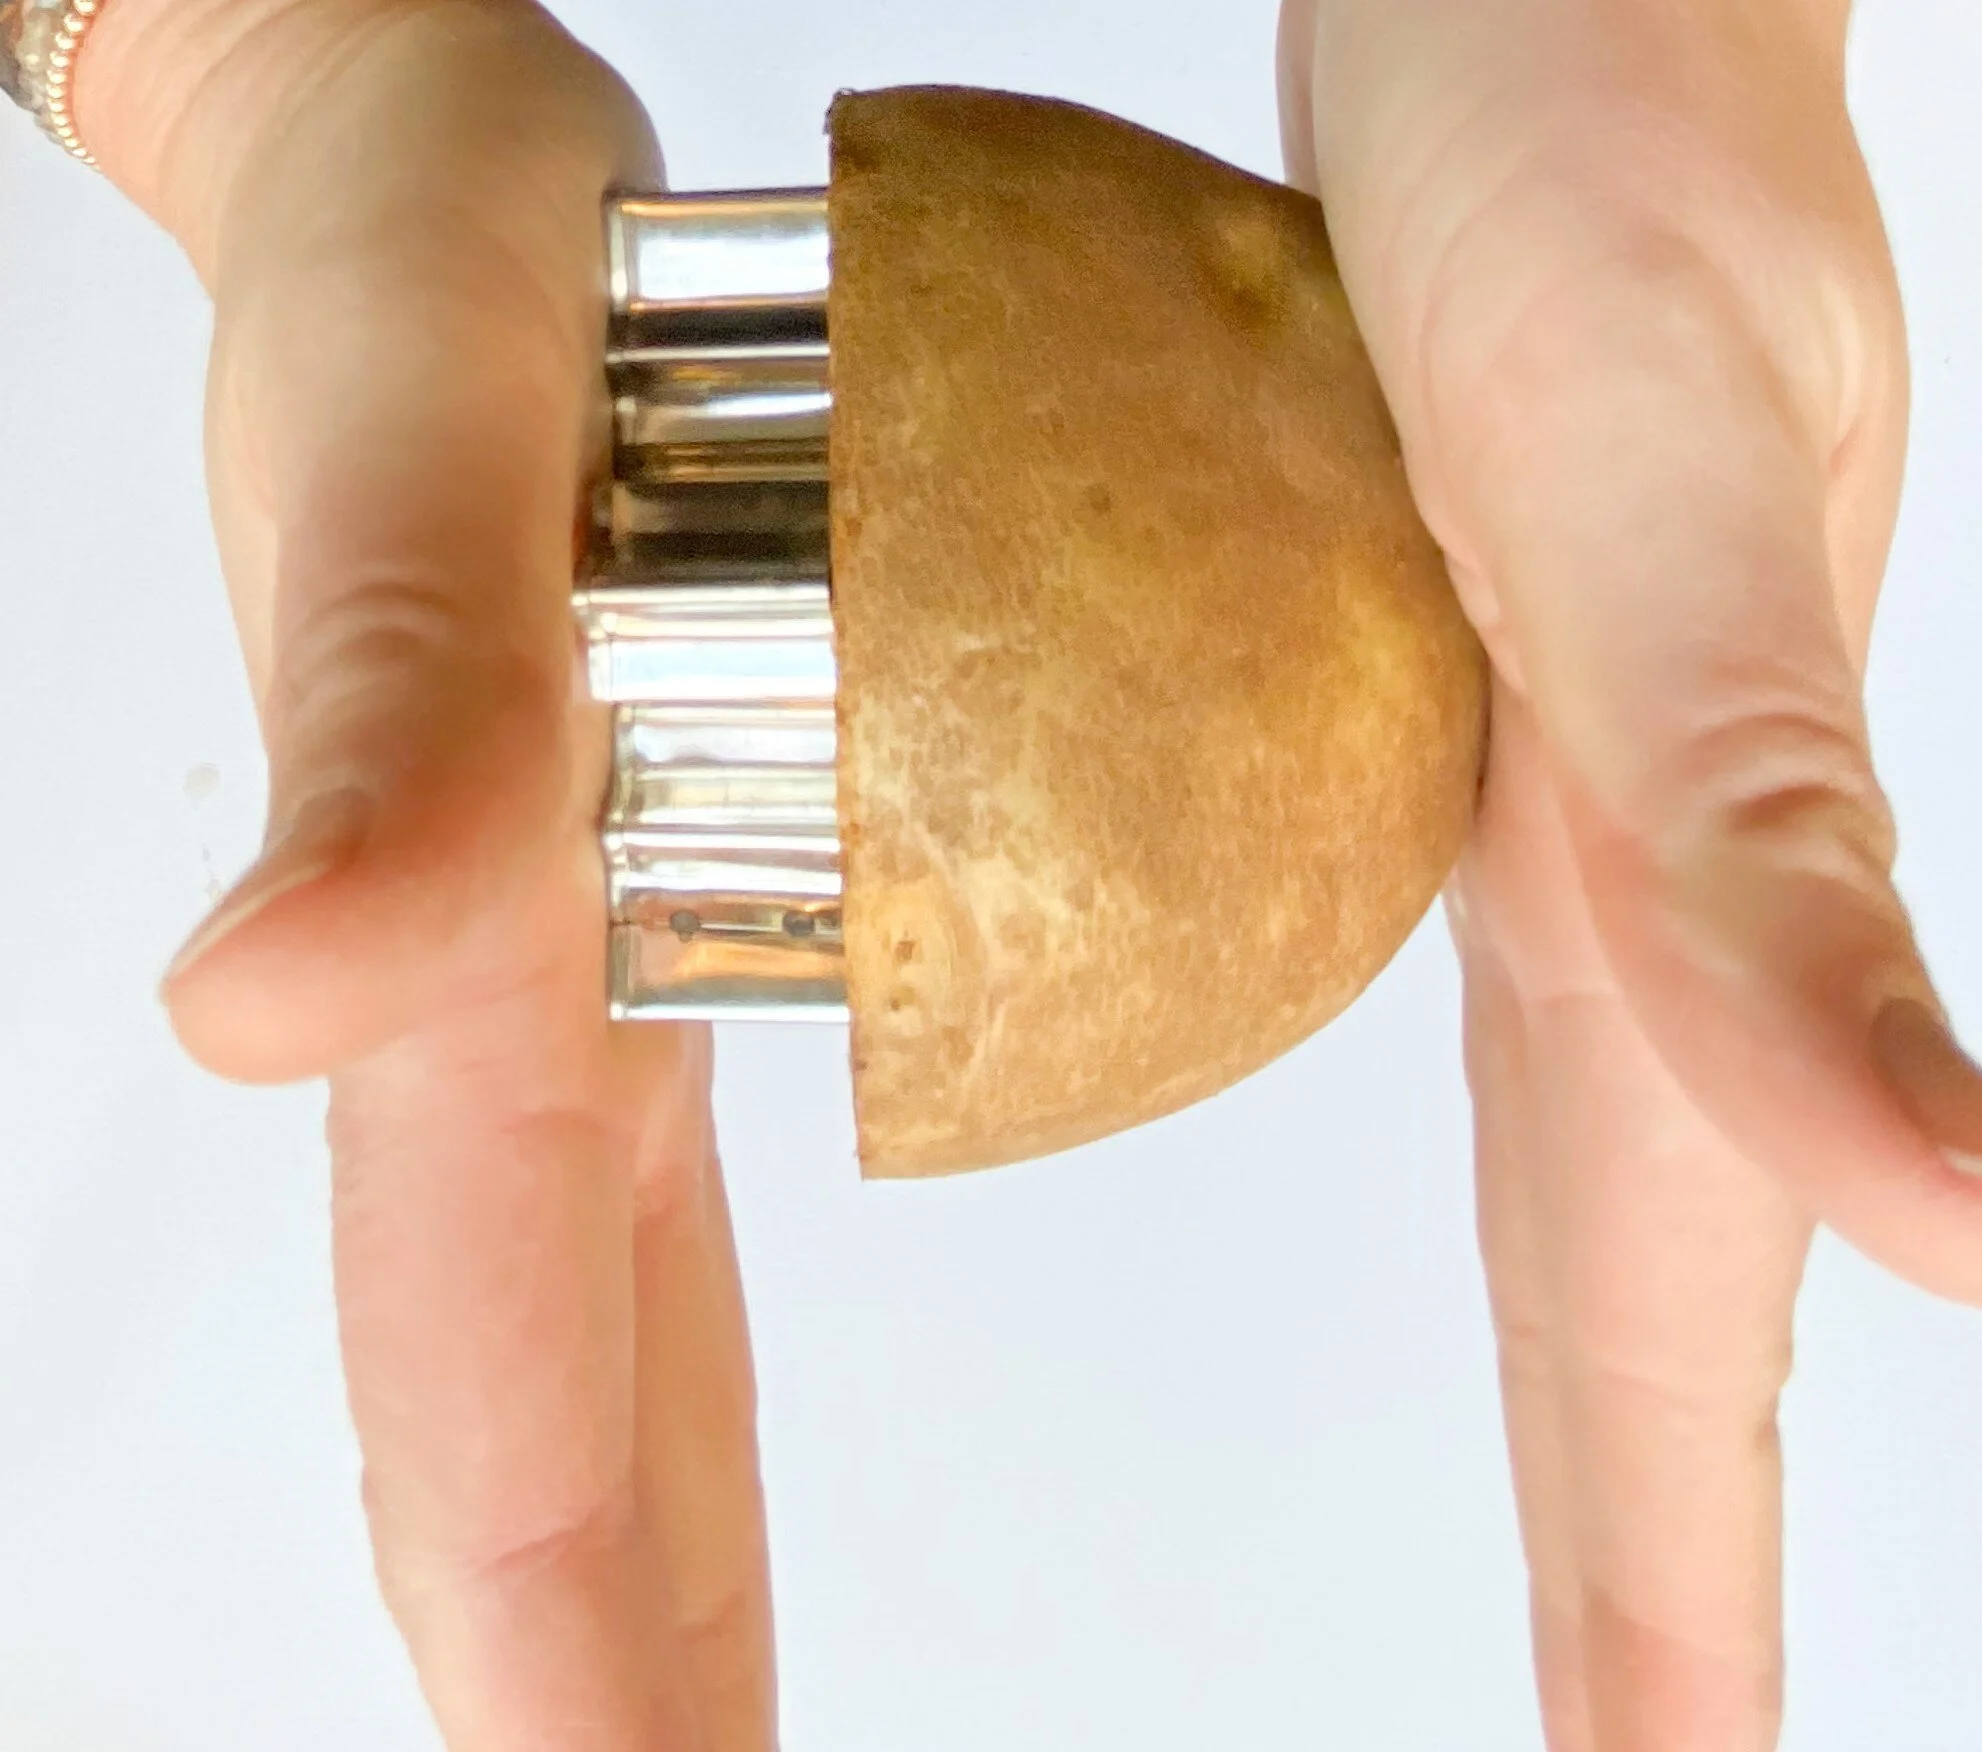


Put the cookie cutter with the sharp edge down against the flesh of the potato. Using the palm of your hand firmly and evenly push the cookie cutter into the potato. You want it to be almost all the way in.
Gently remove the cookie cutter from the potato. A pair of pliers works great if the cookie cutter will not budge with your fingers. You should now have the perfect outline of your shape.


Using a knife carefully cut away the extra potato from outside of the shape outline. You want to cut about ½ an inch down from the flat side of your potato. You should now have the most perfect shape sticking out from the potato. You can now press a dry cloth up against the shape to help absorb any moisture from the potato. You are now ready to print!


Cut your kraft paper to your desired length and lay it out on a flat work surface. I like to tape the ends down for extra hold. Choose your acrylic paint colour and start painting your stamp. You want a nice even layer of paint on the stamp.
Gently push the stamp onto the kraft paper. The stamps can sometimes feel slippery so be sure to be careful. You can slightly wiggle the stamp while it is pressed on the paper to help with the process.
TA-DA your first print! Repeat these steps to create a pattern.


Allow the paint to completely dry and then start getting creative with your wrapping. I like to use simple cotton twine and fresh greenery from my yard but feel free to use whatever you like!
I hope you enjoy making our very own festive wrapping paper at home. We would LOVE to see all of your beautiful creations so don’t forget to tag us on Instagram @pentictonartgallery.
